Wednesday, July 07, 2010

Fireworks Fun

How was your Fourth of July? We did the redneck thing and it turned out great. We drove to the mall parking lot and backed up to the hill overlooking the city (along with an entire mall parking lot's worth of other people). James put down a stack of blankets/foam pads to make the bed of the truck comfy and we had a picnic and fireworks viewing all from the back of the truck.  We didn't fully realize how late it actually gets dark, so we kept the kids out way too late but had a great time. 

Tuesday, July 06, 2010

Pick One

Apparently I have time to either have fun, or write about having fun, but not both. I need a break in the fun.

But who wants to stop having fun??

Wednesday, June 30, 2010

Bonus!

I worked a wedding this weekend. There were two giant, beautiful arrangements for the stage that weren't being moved to the reception. The florist was so kind in wanting them to be used for church services the next morning.  We tried, but the way the containers were structured, it just wouldn't work. One fell while we were trying so after cleaning that up I was unwilling to risk a fall overnight while no one was there to clean up. And so, after learning they would just be thrown away if I didn't, I brought one home. I had to put the container down in a small (clean) trash can and move the seats in my car just to get it here! Then I took the flowers out of the oasis and tried to make an arrangement. Even without the lilies (just can't take the lily scent) there were too many for my largest vase! I ended up making TWO arrangement and I've been enjoying them so much. I realized no one else has been here to see them so I'm sharing them with you instead (pardon the flash photos)!

Tuesday, June 29, 2010

Texture

At this month's Stamp Class, Cheryl had a texture challenge for us - we were to bring something made with an interesting texture (and at least three colors but everything I make has at least three colors so I didn't really pay attention to that part).  After seeing a tutorial by Noell at Paperclipping in which she changed the look of her brightly colored felt by adding Distress Powder , I was really excited to try it.  Although this particular tutorial is only available if you are a member at the website, there is a follow up post with some good pictures here

I have quite a bit of brightly colored felt left after making my teacher gifts, but much of what I make is not in these bubble-gum colors.  I love the idea of adding color variation and interest to these felt ribbons to extend their usefulness.

Distress Powder is a type of embossing powder that has a different look and texture. With all embossing powders, you put ink in an area, sprinkle on the powder, tap off the excess (which goes back into the container) and then heat set it using a heat tool (which is like a hair dryer but with less air flow and higher temperatures).  Regular embossing powder sets to a smooth, glossy finish, whereas Distress Powder sets with a rough, sandy finish.  Then after heat setting, you rub off the "release crystals", which are non-setting particles in the embossing powder. After they are removed (throw them away - don't put them back in the container), you have empty areas where the underlying color will show through. Tim Holtz has a great demonstration here (though don't don't really need the Distress brand inks or the Ranger non-stick craft sheet if you hold your work up to heat it).


This card turned into a series of happy accidents.  I like the end result but I'm interested in the roundabout way it evolved - mostly through mistakes.
  1. The felt didn't get embossed:  When I started working on this, it had been a while since I had seen the felt tutorial.  I didn't remember one key point: you can't get too close to your felt or you'll melt it. I got the powder on the felt just like I wanted it and was so excited about how it was going to look, until I melted it into a distorted little ball.  Ha!  I even burned my fingers trying to flatten it out (how I suffer for my art, and all that).  I didn't know what I was doing wrong, so I decided to use the Distress powder in other areas of my card and just ink the felt.  I really like how the inked felt turned out too, so that leaves me with two fun options for all my bright felt ribbon.  When I inked the edges of the striped paper and the "happy birthday" piece, it brought everything together.
  2. The embossed part of the butterflies is an echo instead of an overlay:  The butterflies were stamped in blue ink, but that ink is too fast-drying to emboss.  I wanted just part of the image embossed anyway, so I cleaned my stamp, inked it in Versamark (a clear ink) and stamped over... but I got it a little off.  Now I'm saying it "goes" with my overall distressed look.
  3. The main panel is set at an angle:  I adhered my black cardstock strips and my strip of felt to my striped paper... crooked.  I thought I was putting them straight but they were too much off to be considered "close enough" and too little off to look intentionally angled.  I decided to just angle the whole striped paper piece on the card to make it look intentional.
  4. The chipboard is embossed green with just some blue showing through:  I originally inked it blue, drew a flourish all over it, then embossed the flourish in green.  It looked really nice.  But when I put in on the card, the difference in my blue ink and my blue felt just turned it sickly looking.  So, I inked up the whole thing, embossed it green and just let the blue show through the release crystals.
I'm always having to tell myself to "just do it" instead of being afraid to do it wrong, so it makes me feel good about the process of creating when it's ok to make mistakes.  I'm glad to have the experience of turning the mistakes into a nice part of the finished product.  Though maybe I'll make another "straight" card with my original ideas!

Monday, June 28, 2010

The Cameron Park Zoo in Waco

If you are looking for a day trip from Austin, or a place to stop on a cross-Texas trip, you might be interested in the Cameron Park Zoo in Waco.  This is a small but fun zoo for the kids.  We were there on a really hot day, but there was a lot of shade along the paths.  I'm glad we went in the direction that we did (starting out to the left, looking at a zoo map) because in later areas of our walk (the right side, looking at a zoo map) there were several indoor spots with aquariums or nocturnal exhibits that were air conditioned (yay).  As it got later and hotter, we were so refreshed to be able to step into the cool for a bit. 

This zoo is a good size for young children while still having some big animals to make a big impact on the little guys.  Of course, as the heat increased, some of those big animals were just napping.  The orangutan did put on a little show for us, swinging and hooting, and the giraffe and elephants were up and about.  The other thing that made this good for young kids was that there were several spots to stop and play - ropes to swing on like the orangutan, statues of komodo dragons and ponies to climb on, chimes you jump on to make ring, a tube slide through the otter pond, and a playscape area.  In some ways, the play spots were more memorable for the kids than the animals (or is this just my kids??).  Sammy chose the jumping chimes to do his first successful two-footed jump!  Hee.

The kids also really liked the wolf and coyote viewing area (where they are walking along the rocks in the third picture) - it was a little cave-like and echoed, so they all got in there and howled loud enough to raise the roof.

The only real downside to this zoo was that they didn't let you bring in a picnic lunch.  There was a restaurant but we weren't to anxious to stop and eat when naptime was quickly approaching.  We did pull some snacks our of our daiper bags and that didn't seem to be a problem.  Overall, it was a good summer day activity!

Tuesday, June 22, 2010

Busy Days

It's been a busy couple weeks for us.  Summer is starting off with a bang (and as a result I might be reduced to a whimper...)  Check out this crew out in the summer heat.  They did so well together.  More on this later, but in the meantime, wishing you happy summer days!

Monday, June 21, 2010

A Fathers Day Card

I am showing the Father's Day card I made for my hubby. I really liked how this homemade cork "button" turned out. I have this stamp set with the tree that I love, but don't ever use. I thought it was a good fit for my longing-to-be-outdoors guy. I also liked giving each layer a little metallic distressing with gold ink.

I made another card for my own father starting with a black base and working in red and silver, but I struggled with it for so long that I just mailed it without taking a picture. Do you ever just feel like you've been messing with some little nothing so long you don't even know if you like it or not anymore? Thankfully, my dad was really complimentary about the card so now I think it must have been ok after all. That's one of those good things about good dads.

I'm really lucky to be surrounded by good fathers on every side.  Hope your Fathers Day was great.

Friday, June 18, 2010

Scrapbook Layout: Beach

(click on photo to see a large version)

This is a layout for Sammy's baby book of his first trip to the beach in which I was working on incorporating more design principles.  I want to improve the way the visual aspects of the page tell the story I want to convey.  I recently joined Paperclipping.com and have been really enjoying the tutorials they have created. This week they are having a festival of layout sharing, so it seems like a good time to share this one - the background was inspired by the tutorial Using Handmade Backgrounds, in which Noell shows techniques to create one-of-a-kind background papers for your layouts.

I wanted this layout to have an open, speckled look to give the big-sky feeling of the beach and evoke the texture of the sand.  To do that, I used my flourish mask again, this time with blue perfect pearls (a sparkly powder that is water activated) in a mini-mister (a handy little spray bottle).  I also chose a cardboard-y feeling kraft paper as part of my journaling area and to fill the corner of my photo block above it.   I also cropped the photo of my husband carrying Sammy in the baby carrier in a way that showed lots of sky to echo that open feeling.

I have very few pictures of my hubby and I in Sammy's book - mostly because I don't have many!  I'm usually behind the camera.  Since I had a shot of the two of us, I wanted to emphasize it.  I anchored it with a lined paper for the bottom third of the photo mat and added a soft ribbon for a feminine touch in a mostly boyish book.

I have found that when I go back to my older layouts they feel very spotty.  I still love them for what they are, but I find myself wanting to group photos to create negative space around the photos.  This grouping and structure is something I plan to continue working on.

Thursday, June 17, 2010

Big 'un

This boy is really growing. His sentence structure just changed overnight. He is so proud of doing things "self".

This was a silly, silly game - something like the summer fun version of a greased pig contest. The watermelons were coated in Vaseline and the kids took turns trying to pick them up and getting splashed when they fell back into the water. Sammy got ahold of the teensy personal watermelon, smaller than a cantaloupe, and wouldn't give it up. While the other kids were trying for the large ones, he put down the teensy one and picked it right back up again (lest anyone else get a try at it). Each success brought a big grin and an electric sparkle to his eyes. It never got old to him. I love that.

I tried and tried to get a picture of the magic moment. I wanted to capture those spark-filled eyes. Darn shutter lag.

That little apron was supposed to keep them dry (I guess).  Given that the front pockets are filling with water, can you guess how dry he stayed?  At least it kept him from being soaked through with Vaseline!

Saturday, June 12, 2010

Water Fun

Zack chose a "popsicle fun" of putting on swimsuits and going outside to play in the water.  It was a good summery thing to do.  I think the popsicle thing is working to make me do some more involved random activities with the boys.  We haven't done very many yet but that's probably good too.

Zack spent a lot of time squirting water at Sammy and trying to get Sammy to squirt him back.  Sammy spent most of his time dumping out the water buckets and whining about being squirted.  I spent my time taking pictures when I might have been better off to referee between the two boys.  Ha, at least I have photos now!

Friday, June 11, 2010

Why do I persist in showing off my errors?

(click on photos for larger view)

I don't know.  Maybe it's because they are what on my mind.

Today I'm showing a layout of Sammy's First Halloween that would be lovely... if only I hadn't dropped an inkpad face down on it when it was almost finished.  Of course I have no more of this background paper.  I thought I might just put a tag over it but the placement looked really random.  Thank goodness, my sister is coming to my rescue: she has some of this paper left (we bought it together)!  I have decided to put the layout in the album as-is for now and when I get a chance to see her, I'll get a replacement sheet and switch it out.  The only thing I'll have to re-do is the stamping of the flourishes down the edge of my photo block.  Even that little tab that goes across from the background paper to the photo block is only adhered to the upper layer so that it will transfer too.

(Edit after some helpful comments and emails: now I realize I'll have to correct the spelling of Halloween as well.  Argh! Oh well.)

I had a hard time getting geared up to do this layout.  I would look at the pictures and feel uninspired and move on to something else.  I finally realized I was picturing them on a black and orange background, simply because it is Halloween.  Once I figured out I'd been thinking that way, it was easy to see I could pick my own color scheme, no matter the holiday.  Then it became lots of fun!

I love that little arrow-shaped photo turn.  I bought it and  ran right home and stuck it on this page.  I also like the tab I mentioned, the one on the right page that leads you to Sammy's eyes (and maybe away from his giant drool-stain? No?).  It was a chipboard piece with a glossy top that said "Dog Gone Sick" in purple in a saloon-looking font.  Weird, no?  So I peeled off the glossy layer, inked it with shimmery white ink, and stamped flourishes on it.  I didn't have any small brads that matched the one large brad (on the green tag at the top right corner) but I inked some small bright copper brads and embossed the ink to force it to dry on the metal.  Cool effect and I remembered to use tweezers so I didn't burn myself (bonus points there).

The other thing that makes me happy about this layout is that it has a little piece of my story in it:  when we made these costumes I was so relieved that I was just following the pattern we had.  I usually go off on my own creative tangent and then find myself having bit off more than I can chew.  My sister ended up having to do that because there wasn't a pattern for what she needed.  I was thrilled to just be reproducing the instructions as they were, for once!  Even though this is in Sammy's baby book, I'm glad I have that window into the background of the costume and my thoughts about it too.

Thursday, June 10, 2010

A Question and a Scrapbook Layout

I have a question: how do you get good photographs of your layouts?

I don't have a 12" scanner so I can't scan them. I used to take photos with them flat on the table but I tried some instructions from the Paperclipping website (which I love, I should do a post about that) to take them with the page taped up vertically, but I don't have some of the things she used. I think the results were an improvement, but still not great. I am having a really hard time getting them square in the frame - usually there is some "keystoning" where the top is wider than the bottom (or vice versa). When I cropped these, I could get the title, which spans the two pages, to line up (it lines up in real life, I promise!). I spend forever on trial and error and wasn't happy with the results so he whole thing was very frustrating. I really need a better method!

Tim Holtz Idea-Ology Masks: Flourish
Well, since it's here, I will share the details of this layout too! I tried something new: painting on my paper with acrylics. You can use art acrylics of course but these are just the inexpensive little craft acrylics they sell in every craft store. The large flourish on the left side is made with a Tim Holtz Flourish Mask (a reusable reverse-stencil which is adhesive backed so you put it on your paper and then work over it, then remove it to create a patterned effect).  I started with a dark blue color and when I was done it was way too stark and the paint was too clumpy.  Even James thought it didn't look right.  I thought about chalking it up to learning experience and starting over, which would have been ok, but before I did I took a sanding block to it, smoothed it all out, and then painted over it with pearlized paint.  This muted the overall look and added some nice shine.  At that point I was happy to get to use it for my layout.

I cut out the image on the right side by partially tracing, partially drawing a corresponding shape on cardstock and cutting it out with a craft knife (hey! my craft knife skills are improving!).  I painted the background page and the cut cardstock with the same pearlized paint to bring the whole look together.  Another weakness of my photography is that you can't really see the tiny silver stars scattered over the layout.  Although they don't show up well in the picture, I think they really add something.

Oh, and check out Sammy's mini-mohawk!  It shows in every picture.  It was what his hair did naturally at that age.  Hee!

Wednesday, June 09, 2010

Boys of a Feather

I had a great conversation with a woman at our church recently about the experience of being a mom of boys. It was so encouraging to me to hear her perspective as someone whose children are grown. Like me, she assumed she would have girls... but had two boys.  And now she can see how wonderful it was for her.  I thought I would have girls, but I wouldn't trade these two little individual people for anything.  That led us to visit about the ways our boys are alike and different from their brothers.

It is striking to me that my two are so much alike. Maybe it's because I was told that the second would be so different from the first, or maybe it's because they are still so young, but I am continually amazed at how similar they are.  Their little laughs are just the same.  They love books.  They need a lot of sleep or they immediately get sick.  They have had similar eating patterns.  They are an endearing mixture of bold and shy... in such a similar way!  Check out their little "concentrating faces".  I know I'm their mom, but man: those boys are such neat little people.

Tuesday, June 08, 2010

Popsicle Fun

Remember the Summer Bingo card? I needed something for a "prize" so that it would be fun to get a Bingo.  I took another idea from Stacy Julian (who has her kids do "popsicle jobs" where they take a popsicle stick from the jar and do the job written on it) and changed it to work for us.

Since all the Summer Bingo items are things Zack can do on his own, I typed a list of fun activities that take my involvement and printed them.  They are things like:
  • Cook something together 
  • Put on swimsuits and play squirt guns outside 
  • Play Connect 4 together 
  • Make a card using Mom's stamps
  • Build a Geotrax layout together

There are twenty-two of them, the last one being "Zack's choice".  I cut the printout into strips and stapled them to popsicle sticks.

To make it festive looking, we got out the craft paints and painted the sticks first (one stick for every bottle of craft paint in my stash - oh my!).  Zack helped, which was a bit of a mess but that's ok, right?  I figured it was a fun activity in itself.  We could have just written them on the sticks but I was enjoying using a bunch of new fun fonts I downloaded to make every line different.  I used colored staples too which looks cute.

When he gets a Bingo, he can pick a stick and we'll do it.  I'm hoping it'll be a good structure and balance between him doing things on his own and me stopping doing chores to really pay attention to him.  I hope it turns out fun! 

Monday, June 07, 2010

Camping at Pedernales Falls

We had a fun overnight camping trip to Pedernales Falls State Park this weekend. The kids were thrilled to sleep in a tent and spent the late evening hours when they were supposed to be sleeping whispering to each other.  I'm glad it was so cute because they were certainly missing out on sleep!  We planed it for only one night, which really makes planning a lot easier.  And, I feel less stressed about it because even if we forget something important or don't sleep well, it's easy to handle just one night of poor sleep.

In the area where I grew up, if we went camping it was to the nearby mountains.  We lived in the desert, so of course we wouldn't camp there - too hot!  We would go to the pines where we would need a sweatshirt at night in the middle of the summer and could sit around a campfire.  Here in central Texas, there just isn't any mountain we can get to for a quick trip.  It has always seems strange to me to camp in the heat, but spring and fall are short and rainy so we end up doing summer trips just to get our camping fix.  We're getting better at it.  The trick is to go somewhere where you can play in the water. 

At Pedernales Falls State Park, there is a pretty area where you can hike down and see the falls, but to swim you need to go to another area.  We found it was a surprisingly steep hike down, but really fun once we were down there.  There was a sandy, shallow area that worked for my little ones and deeper river area where older kids were swimming.  At only a 40 minute drive from Austin, it would be a great place to go with a picnic for a day trip of water playing even. 

Our campsite worked out well for us too.  Because my husband's parents were their with their camper, we were in an area with an electrical hookup.  James (bonus husband points right here) brought an extension cord and a small but powerful fan so that we had a fan in our tent!  With the fan, the temperature was perfectly pleasant for sleeping at night - even a teensy bit chilly by early morning.  If you're looking for a nearby spot, this is a good one!

Friday, June 04, 2010

Today's Lunch

A hot dog? Seriously. I've really been wanting one. This is a nice quality turkey dog, in case you are wondering, but it still counts for the summer hot dog fix.  I had to gourmet-it-up a bit.  Guacamole, romaine, mozzarella, cucumber, sprouts, tomato and mayonnaise: YUM! 

Why am I showing it to you?  It just seemed so pretty!  For a hot dog anyway.

Thursday, June 03, 2010

Summer Bingo


After reading the great ideas I referenced in my last post, I thought I'd try a version of Summer Bingo. I made this a better fit for us by changing the activities to all things Zack can do on his own. That developed as I was writing it, so I think I need to fine-tune a little, but it's just printed out on printer paper and clipped onto a clipboard we already had. My thinking is that whenever Zack is stalking around wishing he had someone to play with or wondering what to do next, I'll tell him to go do something from his Bingo card. I think I'll get out a littl star stamp (or even just draw a star with marker) for each item he does. I am thinking we'lll get a new card each week or whenever we fill one up.

What about the Bingo prizes? I haven't decided yet. Maybe for every bingo he can do a fun game or activity with mom?

Saturday, May 29, 2010

Thinking about Summer

The summer feels like it is stretching long ahead of us.  I am vaguely remembering that I was stressed about "what are we going to DO?" last year and then summer was over before I could even blink.  So, maybe I should be more intent on making the most of the time instead of just making it through.  Not sure if I can manage that, but a person can try, right?

Stacy Julian has some fun ideas:
   Summer Bingo - a bingo card with ideas of good stuff to do each day - points for accomplishing valuable things plus somewhere to direct them when we hear "what can I do, mom?"
   The Ticket to Summer - a list of ways to earn a ticket and ways to redeem your tickets, like special playtimes with friends, sleepovers, staying up late ... plus they translate to bonus money for school shopping.
  Summer Fun Clipboards - a big family board with handwritten squares of "big" fun things they want to do over the summer (jumpy place, water park, family reunion) and little clipboards with a daily list for each kid before they can play or go anywhere.

These are clearly written for older kids (she has 5 - the oldest is 17 and youngest is 4 - I think), but there is a lot that could work for us, especially for Zack at 5.

Friday, May 28, 2010

Houston: Space Center


James decided the best thing to do on the last day of pre-school was to take off on a fun weekend trip. He decided Wednesday night and we left on Thursday after "graduation" and work. He booked a hotel and planned the itinerary, so I just did what I had time to do and then got in the car. It worked out pretty well to take a trip with me just going with the flow!  Maybe all our trips should work like that.

The first stop on our whirlwind visit to Houston was the Space Center. Zack has always been keen on the moon and astronauts so we've been wanting to take him to the Space Center for a while. James remembers this as a great place he visited as a kid. At that time, the visitor area was in the same campus as NASA's working area. Now it has been split into a separate campus but there is a tram that takes you (after additional security scans) through some key locations in the NASA area. The boys considered it at "train" rather than a "tram" and we went with it because that was exciting for them.  As we went through the artifacts, I was most impressed with the size of the Saturn V rocket that sent Apollo 11 to the moon (that's it in the bottom two pictures). It was gigantic!  There were also lunar rovers, moon rocks (which we all got to touch) and many other cool things. The one thing I didn't like was the placement of the very cool play structure. It was the first thing you saw when you came in the door, so of course the boys wanted to do that and didn't really want to see the rest of the exhibits. We did drag them away to look at actually cool stuff, but then they wanted to go back. We did go back, and yes, it was a fun playscape. How about putting that at the back, museum planners?

Thursday, May 27, 2010

Book Review: Honey for a Child's Heart by Gladys Hunt

Honey for a Child's HeartToday I'm over at For the Love of Books with a book review of Honey for a Child's Heart: The Imaginative Use of Books in Family Life.

I've already pulled some of the recommended titles from the book lists to request at the library, but I'm even more excited about some of the habits she suggests for reading together.  Check it out!

Wednesday, May 26, 2010

Teacher Gifts

I really wanted to make something as an end of year gift for Zack's teachers but wasn't feeling very kitchen-y.  I have a hard time with gifts like this.  There is a lot of pressure to give gift cards.  I feel like this gift-card-society is something I can't quite get my head around.  Like if you are going to give a gift, of course you want the person to be able to have something they actually want.  But then on the other hand, you want to give a part of yourself, a connection, as well.   I've decided on handmade gifts, choosing items that I think I can do a good job with, but I can't help being self-conscious about it too.  I don't want to give something that isn't of value... but any item, even a gift card can turn out that way, right?  I've had too many gift cards expire or be lost (shh, don't tell anyone, I feel bad about that too!).

Anyway, back to what I actually did.

A few weeks ago I went to a stamping class in which we made a handmade box to use for gifting handmade cards. That inspired me to create two gift sets with four handmade notecards, four matching gift tags in a matching box. They all used some felt cut-out ribbon I found in a rainbow of colors. I originally wanted to put the whole rainbow on each card, but it turned out to be a little much and I had to settle for some pretty color pairs.

I liked how the cards turned out. I used my new Crop-A-Dile Big Bite to quickly and quietly set the eyelets for the tags, which I also liked. Both have a lot of texture with that felt ribbon. I didn't love the box, though. Cheryl's design was perfect - easy to make and sized exactly right, but I just thought the color turned out too pale for the cards and tags. Also, when we made it at class we used masks so the stamps could overlap for a much more elegant effect, but it was after midnight and making masks wasn't in the cards (so to speak, heh).

I was surprised at how long this took me. I usually make cards for the fun of using random paper scraps or to get the creative juices flowing. I guess I thought that creating one design then duplicating it eight times (sixteen if you count the tags, and I do) would go pretty quickly. Not so. This was time-consuming! I keep thinking I should make some for myself but I'm all out of that flower-circle paper... and I got tired. Not tired of making them, just tired!

Tuesday, May 25, 2010

Last Day of Preschool

Thursday was Zack's last day of pre-school.  It feels like a big change for our family.  Three days of school a week feels about right for our family. Maybe after a summer of no school I'll be more ready for that change, huh? 

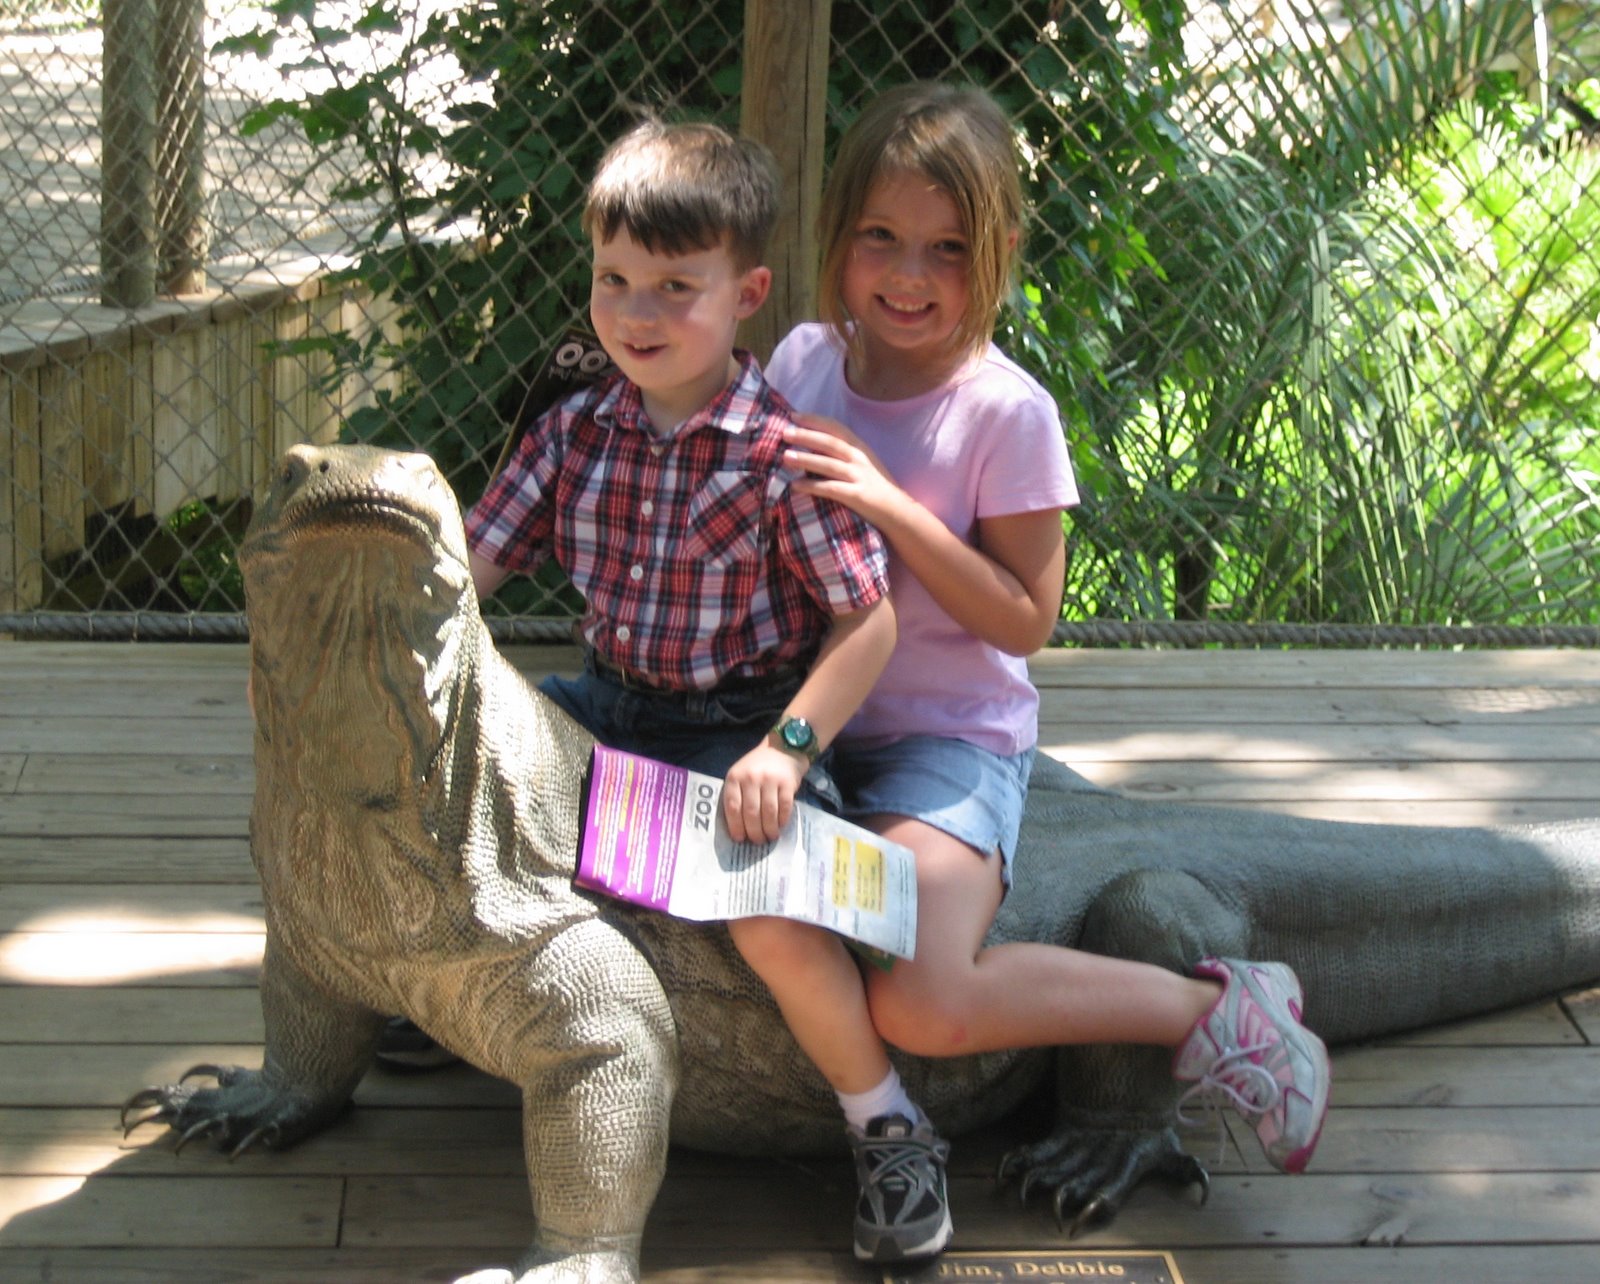
We attended his graduation then took off for a weekend of museums and other fun in Houston.  Now we're back and the reality of pre-school being done is sinking in.  Elementary dropoff isn't going to look like this, is it?