Showing posts with label Crafts. Show all posts

Thursday, September 26, 2013

Upcycled Starbucks Bag


For a while now I've been saving the packaging from my Starbucks coffee beans.  I buy coffee at Costco in 40 oz bags, so after I open up all the seams and wash the empty bags, I have a pretty large piece of material.  If you haven't felt of these bags, the material is a tough, plasticized foil, printed all the way around with the Starbucks bag design.  It would normally just be trash, so I think I started saving them because they seemed just tough and useful without having a specific idea of what to do with them.

The idea for the bag came about when I was wishing for a large, tough, not-easily-stained bag to take my stuff to the ballpark.  Both my boys play baseball so we are at the ballpark a lot.  I take a poster, a large scorepad and pencil, and various snacks to  every game.  I got tired of lugging things individually and none of my bags were right - mostly they were either too small for the 12x18" poster or not stiff enough.

When I recently got my new sewing machine (which I should post about!  We'll see if I get around to it though), I finally worked up the motivation to make my envisioned tote bag.  I started with five coffee bags, plus an extra, small bag from another brand of coffee that I sewed in as a pocket. I used two bags of the newer packaging design for the outer material, two bags of the older bag design for the inner liner, and another older design bag for the handles and a little anchoring strip inside the bag.  I also used some sew-in interfacing purchased from Hobby Lobby to give it a little more stiffness and something in between the layers of foil.

 To make it, I took four of the bags and trimmed off the previously crimped edges and made them all the same size.   I should have sewn the pocket and anchoring strip in at this point, but I forgot and had to struggle with it later.  But it would have been the right time to do it!  I sewed the inner pieces, right sides together, on the sides and bottom.  I did the same with the outer pieces, but also with the lining on the wrong side of the "fabric" (it was a stack of four pieces - lining, fabric, fabric, lining).  Then on each bottom corner of each bag (inner and outer), I sewed across the bottom corner and cut off the resulting triangle so that it would make a box-bottom. 

I made the handles with four strips of the extra fabric.  I sewed two strips together (attaching the short ends) so that they would be long enough to carry my poster in my finished bag.  A person would normally sew a tube, turn it right-side out, then use it as-is or after top stitching it, but this material is way too stiff and difficult for that.  Instead I just finger pressed the edges under and sewed it right sides out.  

My plan had been to nest the two bags, right sides together, sew the top seam except for a few inches, turn it right-side-out through the hole and then top stitch it closed.  However, turning just one bag, before sewing them together, was so difficult that I realized I would never be able to turn it through a hole.  SO, I folded in the top toward the wrong side on each of the bags and finger pressed it.  Then I put the bags inside each other, wrong-sides-together, placed the handles where I wanted them, and sewed around the entire top.  I had to fudge a little since the inner bag was not smaller than the outer bag and there is no stretch to the material.  What this meant in practice was sewing them together with the seams of the inner bag not quite all the way open.  It seems to have worked great!  I did reinforce the area over the handles with some extra stitches.

This material is not easy to work with.  The lack of stretch and the fact that every pin hole is permanent meant that I didn't want to pin much, and yet I needed to sew the pieces together without some helpful stitching that would be there if I were working with traditional fabric.  I am not planning to run out and make five more of these (yes, I do have coffee bags left!), but I love the result!

Monday, October 15, 2012

Scrapbook Layout: City Museum


Here is the layout I made about our visit to the City Museum in St. Louis.  We had SUCH a great time there.  I wanted to do a layout about the fun but also try to capture the kind of weird, fun, dark aesthetic they have.  I started by putting a black vignette on all the photos, then used a dark background and added inking, stamping and splattering.

There is quite a bit of stamping on the background but it's really subtle - you may not be able to see it here.  For example, there is some text stamped on the purple background paper that is barely visible in the bottom photo.  Even the chipboard flourishes are inked and stamped.  In the future I may try to make that more pronounced but I don't know.  Sometimes you don't really see an element but it still adding something.  The splatters are a combination of white misting spray and diamond Stickles.  There is also one small star punched out of glitter paper using the mini star punch from the Stampin' Up holiday mini-punch pack.

One funny thing is that green polka-dot paper.  It is out of one of the first scrapbook paper packs I bought when I started scrapbooking and I was pretty sure I would never use it again.  For some reason it called me back to combine it with that great, current Basic Grey paper that is used for the background.  

I'm not sure if I really captured the weird/dark, but that's ok!  I may go back and add something, but I'm still not sure what (ideas??). 

Thursday, October 04, 2012

Scrapbook Layout: Cool Dad Fun Dad Tech Dad


In deciding to work "topically" with my scrapbook albums, I realized the adults in the family don't have much airtime, so to speak, in my layouts!  That is part of the reason I made the Oh Coffee! layout (the other part is that I really just like my coffee that much).  But I wanted to scrapbook some things about James too, and since I was really impressed with him after we saw the solar eclipse this summer, I decided that was the perfect vehicle.

Also, I really wanted to stick the pieces of the dismantled floppy discs on a layout.  It's very nerd-cool! (Or maybe I'm nerdy so I think it's cool?)

I had a piece of paper from Basic Grey that was perfect for the background of this layout, but only one sheet.  I used it as a model to make these two background papers you see here.  I was very proud of how all my inking/sponging/spraying turned out!  There are some areas that don't look good AT ALL, but they are under the pictures.  Sneaky, huh?

I also got to use my new Stampin' Up! Delicate Doilies Sizzlits Die.  It had a very sunny look and I think turned out plenty masculine with the rest of the layout in place.

I wanted "nerd dad" and "geek dad" to be part of the title, because I think of those as positive things... but I wasn't sure James would find them as positive, so I settled for the three: Cool, Fun and Tech.  Pretty great things for a dad to be, we agree!

Monday, October 01, 2012

Scrapbook Layout: All About Us


I have recently been thinking about organizing my scrapbook albums topically.  This is an idea from Stacy Julian (specifically this book, though she discusses it in multiple formats), who is really really good at working with people to draw out what is important to them.  It's no coincidence that her online education website is called Big Picture Classes!  The first category will be called All About Us and will be layouts about our little family and the personalities of each person in it.  

I made this layout as a title page for the first new section.  The printed background paper is one that I love but that was so pretty I hated to use it on something that would cover up most of the paper!  So, I thought it would be perfect for a non-photo layout.  The very background green paper is there as a frame for the busy-ness of the main paper.  I inked and splattered the edges to make it match in style.  The rest of the layout is made of bits and pieces that I kept layering until it looked like enough clutter to make me happy!

I don't usually do layouts without any photos, so this was a bit different, but I really like how it turned out!

Thursday, August 02, 2012

Other Challenge Quilts


Want to see what all the other participants made out of our Reunion Challenge Fabric?  There were 9 projects - all different but all BRIGHT!   

A couple of interesting notes: 
  • Pooh Bear has "I'm just a little black rain cloud..." embroidered on the narrow burnt orange border. 
  • The draped one just to the right of Pooh Bear is a two-sided crazy quilt with lots of denim.  It was too heavy to hang but was really amazing and interesting!
  • The draped one, the baskets on to it's right and the large blocks in the bottom left are all done by beginning quilters, though they look GREAT.
  • The flower one in the middle of the third column is all hand-pieced and hand-quilted.  The flowers are 3-D.
  • The one in the bottom right has the center pinwheel area all made of Halloween fabrics!
It was interesting to see all the variety!

Wednesday, August 01, 2012

Challenge Quilt


Here is my fourth Reunion Quilt Challenge quilt!  

Each reunion the group of quilters chooses a fabric to make something out of.  Everyone who wants to participate takes a piece and brings back their project in two years at the next reunion.  You can see the first three challenge pieces here: Itty-Bitty, Herb Garden, and Pink Flags.

The challenge fabric is here, second from the left, with it's optional companion fabric on the left end.  The other fabrics are ones I chose at the same shop to use with it. 
(click for a larger view of any image)

I chose a pattern that was designed for a wall hanging to a full size quilt and then adapted the size and color scheme to make a miniature.  The finished project is 16"x20" and machine-pieced and machine-quilted.  

I had a hard time figuring out how to quilt it (once again, my mom was soooo kind to take out my false starts and mistakes to minimize the pain of re-doing!).   I have looked at a lot of quilting and I have noticed that when a quilt is very geometric/straight line I tend to like the finished result with the quilting is curvy (rather than straight and following the lines of the quilt).  That's something I plan to keep paying attention to as I see quilts, but I think it holds true.  Once I tried out these wonky spirals inside the squares I loved the result.  And I always like the meandering quilting so I used that to tie together the progression of background colors.

It was REALLY fun to make and I like the finished result best of the quilts I've made!  It's so bright and so wonky and fun that I find it very inspiring!

Come back tomorrow to see everyone else's projects with the same fabric(s)!

Saturday, June 02, 2012

Scrapbook Layout: Remember When

"Remember When..." is all from our wonderful visit at the end of last summer from my sister Julie, her sons, and my mom.  There were lots of fun moments with different combinations of those people - James with the kids, the various pairs of cousins, Julie and I, my mom and Zack... I wanted to include pieces of all that so I printed a three-by-three grid of the little photos.

Do you have a way you love to print smaller photos?  My favorite is to use Picasa (a free program from Google) to make a collage and then print the collage at the photo shop.  There are lots of things I like about Picasa, but that is for another post!  In this case, I chose a "Grid" collage (where all the pictures are the same size), printed the photo as an 8x8" print at the Costco Photo, then cut the images apart to use in the same grid design.   

The layout itself is made from a kit made at Cheryl's fabulous scrapbook layout class!  Her classes are cool because you can leave with a finished layout ready to attach your 4x6 photos, or make all the pieces and then use them as a kit later.  Since I'm always doing something odd or adding tons of photos, the second option is really fun for me. 

Tuesday, May 29, 2012

Paper Art


This is a fun paper art thing I made into a regular 8,5 x 11" frame.  I was inspired by this awesome creation by Leann, who was very nice to help me understand how she made hers!  She says she will soon be having this published so if I figure out where, I will add a reference.

I used paper as a base since I didn't have a canvas.  It is made of 2.25" punched circles, folded into squares and glued on the base sheet.  I measured the middle of the sheet and then marked 45-degree lines so that I could get all the pieces angled correctly and that showed me where to stamp and gold-emboss the decorative bits in the corners. 

Once the circles were glued on I was able to make/find a collection of little embellishments to increase the 3-D-ness of it.  The supplies are primarily Stampin' Up! and Basic Grey (from this prize, actually).  Pretty, pretty.

I like it the finished effect.  Right now I have it in my living room, but I think I may hang it on the wall in the craft area, on the logic that beautiful paper always inspires me!

Wednesday, March 07, 2012

No time to craft?

Hey everyone!!  Been wanting to make some stuff but regular life keeps getting in the way?  Wish you could just set aside some time to create?  You would but the kids would interrupt you every ten minutes?  ("Ten minutes?!" you say, "try every 30 seconds!!") 

Well, I am so excited to be attending a crafting retreat at the end of June!  It is Cheryl's Rockin' Retreat and it is an entire weekend to create, chat, relax, learn or any combination thereof!  It's going to be awesome!  If you can be in the Central Texas area, how about joining us?  
---------------------------------------------------------------------------------------------
I'm even teaching an optional class and so are several other people:  Bits and Pieces: Designing to Use Your Scraps $10
Are all those pretty paper scraps landing in the trash bin?  Use them instead! 
We will make three projects while learning to use the little bits and pieces we normally throw away.  We'll also learn a basic system for organizing scraps so they are easy to save and use. 

Even if you have no idea how to start designing something to use your scraps, this fun class is for you!

Monday, March 05, 2012

Scrapbook Layout: Ninja & Shark

I might be a little off-season with this layout, but I have really been wanting to use these awesome photos taken by our friend Brian Dewey at Halloween!  He's a talented professional photographer and also part of our kids' carpool so it was really exciting when he offered to take Halloween photos of the kids at a neighborhood party.  The images are so different than what I could manage with only the available lighting and my point and shoot flash, that even though I don't normally do a Halloween layout, I wanted to this time. Doesn't Zack's intensity about his costume show through the picture?

I was glad to use it as a chance to capture how their ages and personalities showed in their costume experiences, so it wrote on die-cut Top Notes*, one for each boy.  I wanted a spooky but elegant look without using pre-made Halloween products (since I don't do a lot of Halloween scrapbooking, I didn't want to buy any custom product with spiders or what-have-you.  Also, I just like the less Halloween-specific feel).  I choose black background paper and a dark brown transparent overlay made by Slice/Making Memories (I can't find a link to the transparency sheets so maybe they don't make them anymore).  I intentionally left a strip of the transparency without any backing.  I plan to do another layout to back it with that will coordinate with that spot, but I don't know exactly what- wish me luck! 

The title is done with Thickers in felt - I love how they feel!  You can feel the texture even through a page protector.  Then I added black, die-cut leaves and black, hand-cut branches.  Branches are not hard to hand cut, especially when they are supposed to look bare and spooky!  I got the idea for the row of paper flag/pennant pieces at the bottom of the pictures from somewhere else but I can't find it (not for lack of trying!) so thank you to a nameless inspiration!  To finish it off I stamped the bird from the Stampin' Up! Notably Ornate* set, embossed it and cut it out.  That bird can look pretty or spooky!  Or maybe both!

*If you use the links above my friend and fabulous Stampin' Up demonstrator, Cheryl, will benefit, but so will you since you'll get the preferred pricing by checking out through a demonstrator! 

Friday, January 27, 2012

December Daily: pages part 2

Today I'm showing a few pages from the middle of the book where I worked on capturing the boys school art and events.  They bring home so much stuff that I'm always completely overwhelmed.  I am ok with recycling the worksheets but the stuff with their writing or art on it is harder.  I try to narrow down and keep only best or the most representative items... but that requires thinking so I put it off.  And when I do bring myself to do it, I find that even the "best" stuff still ends up just sitting there, without anything done with it.

For this album I picked one page from each boys stash of creations and folded it up to 5x7 and put it in the book.  I really like it in there.  Because it is squared off, it has a neater look than I though it might.  I added it on the day I was showing pictures and journaling from Sammy's program and Zack's class party.  These were also their last days of school for the semester so it forms a big finish for the "at home" portion of the book.  After that it's all travel - a "most delightful journey" (if the fortune cookie says it, it must be true).

Thursday, January 26, 2012

December Daily: Pages part 1


Sammy was so funny with the chopsticks this day! I couldn't resist pulling out the camera in the restaurant and getting a series of pics. Then when he resorted to the fork it was priceless! I didn't show the picture here, but on the back I put in our fortunes from the fortune cookie - it said Sammy has "a magnetic personality". Well, I think so!
I wanted the pictures all in one long row, so that the progression would show, but to print them small enough to do that in 7 inches really wasn't cutting it.  I ended up making this accordion fold so that you have to pull out the tab to see the final (fork) picture.  I just used three sheets of heavy cardstock with "hinges" made out of brown paper punched with the Stampin' Up Modern Label punch.  
I like the view of various pages and embellishments that peeks through when you are looking at a different page. Here, the little heart from the picture of James reading to Sammy shows up after two more pages are turned.

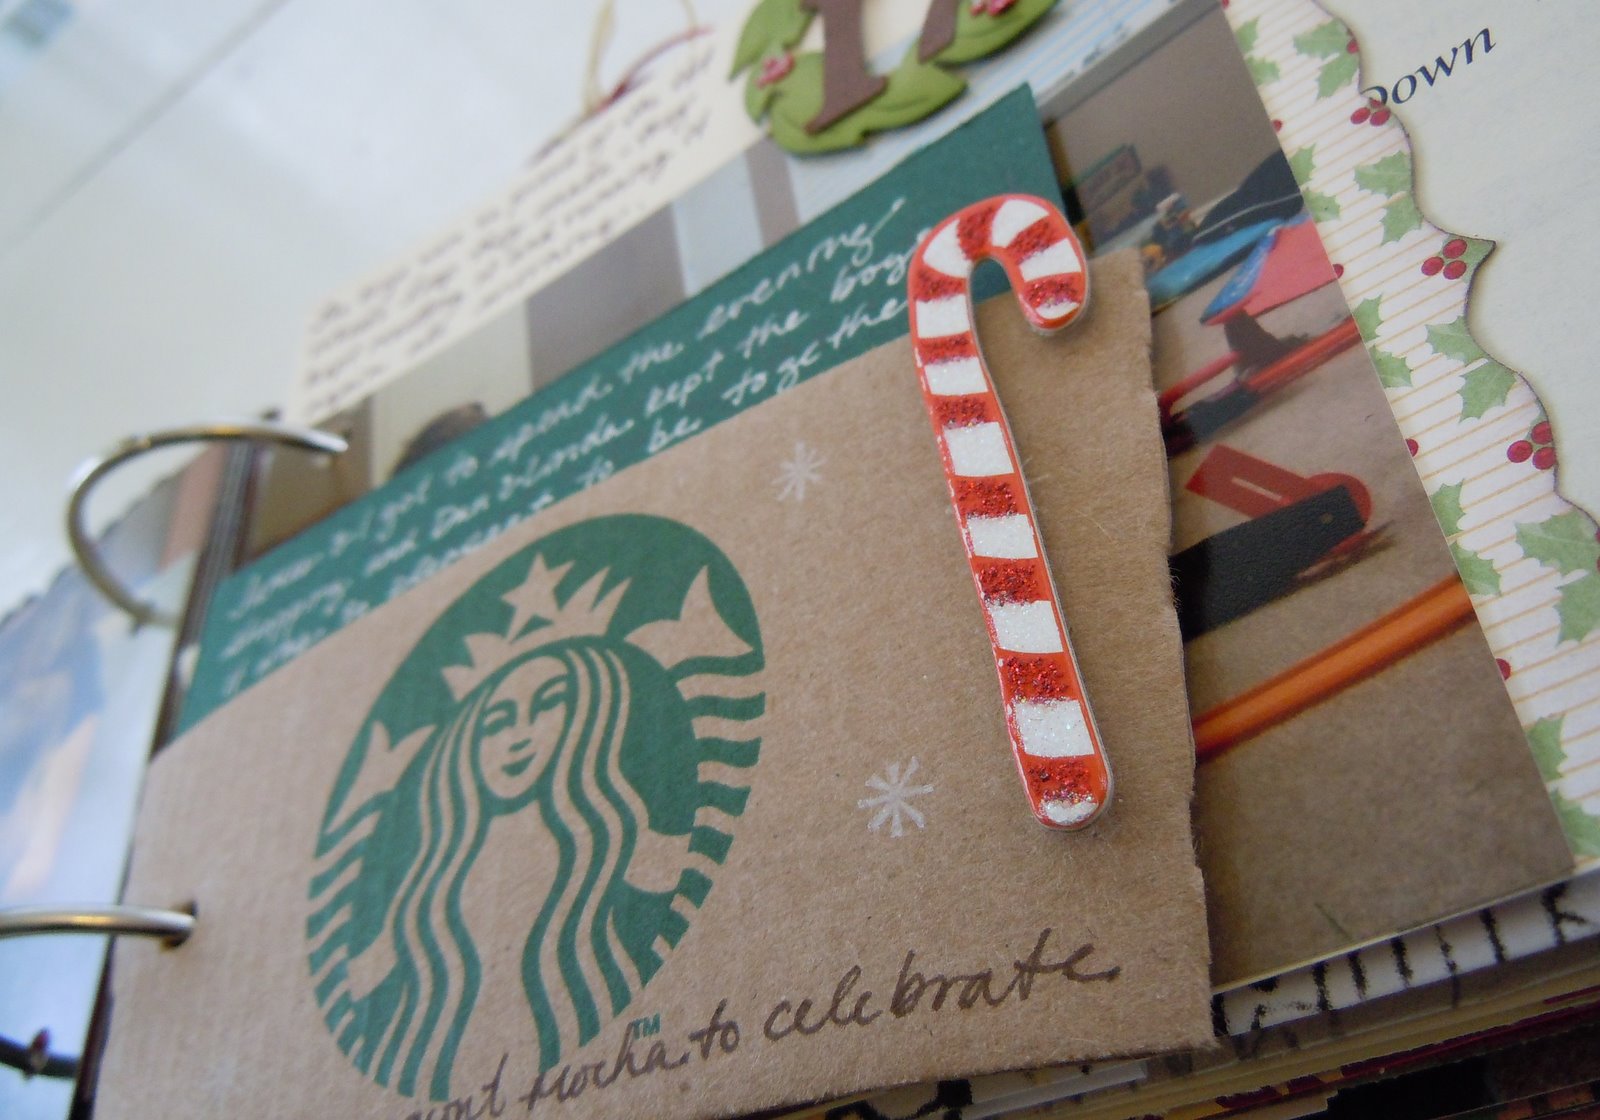
And how could I have a December Daily album without a Starbucks sleeve? That would be as wrong as a December without a Peppermint Mocha! In this case it gave me a place to talk about the evening James and I spent shopping, just the two of us. I didn't have any pictures of us but it was a memory I wanted included.
I'll be back tomorrow to show how I included some of the kids school events/work!

Wednesday, January 25, 2012

December Daily: Finished Album!

I am sure many people are soooo over the holidays and December, but I'm excited to have finished my December project!  I don't care that it's the end January - I'm thrilled to have finished anything.  I mean seriously, how often do I start AND finish something, and all in a row too?  (You don't need to answer that.)

This is a December Daily album, as inspired by Ali Edwards and many others (here's another extremely pretty one). I showed my kit a while ago. I finished (notice how I am repeating that word finish?) it Monday but it took me until today to work up the energy to photograph it! It turned out kind of large. But hey, it's a whole month!

I do this project a little differently than some - I don't fully make the pages ahead of time and I don't work on it daily. The upside of making a kit instead of pages is that I can choose the papers that I like for each photo and I'm not locked into a certain page size for each one.  The downside is that it takes a little longer during December, a month that is already over-full.  But, the creative part is what interests me and draws me to the project, so that's better for me.  One big mistake I made was not making the cover ahead of time.  Somehow I had a hard time getting started on the pages without a cover to draw a color scheme/style from.  And making the cover was daunting so I kept putting it off.  That led to me starting way late in the month, which I hadn't intended.  Next time I want to stick with making the kit rather than finished pages but finish the cover ahead of time.

There are a couple of reasons that it works better for me not to work on this daily.  The first is that I print my photos at a photo shop (meaning not at my own house, on my own printer), so I don't have the photo for today at the end of each day.  I like the color by sending them out to be printed and Costco is close, cheap and our local Costco's prints are great (I think they calibrate their machines more often than other places).  I don't my going by there a few times a week so it isn't a big delay, but it isn't daily.  The second reason is that I can't really work in the time to make things every day.  My time is organized more by week.  I have two or three two-hour blocks that I try to use for creativity.  A lot of times I can do a little more here or there, but I just don't like the pressure of trying to work EVERY day.  Too much stress!  And this is supposed to be fun :)  When I realized that my time is structured weekly like this, it was very freeing and inspiring.  And fun!

The think I like best about my finished album is the way the pieces peek out the sides and top, and out from behind the other pieces, but without the whole thing feeling too messy.  And the fact that it is finished!

I'll be back with some pages to show soon.