The summer feels like it is stretching long ahead of us. I am vaguely remembering that I was stressed about "what are we going to DO?" last year and then summer was over before I could even blink. So, maybe I should be more intent on making the most of the time instead of just making it through. Not sure if I can manage that, but a person can try, right?
Stacy Julian has some fun ideas:
Summer Bingo - a bingo card with ideas of good stuff to do each day - points for accomplishing valuable things plus somewhere to direct them when we hear "what can I do, mom?"
The Ticket to Summer - a list of ways to earn a ticket and ways to redeem your tickets, like special playtimes with friends, sleepovers, staying up late ... plus they translate to bonus money for school shopping.
Summer Fun Clipboards - a big family board with handwritten squares of "big" fun things they want to do over the summer (jumpy place, water park, family reunion) and little clipboards with a daily list for each kid before they can play or go anywhere.
These are clearly written for older kids (she has 5 - the oldest is 17 and youngest is 4 - I think), but there is a lot that could work for us, especially for Zack at 5.
obsessive reader - chemical engineer - stay at home mom - sometimes cook - memory keeper - wannabe writer
Saturday, May 29, 2010
Friday, May 28, 2010
Houston: Space Center
James decided the best thing to do on the last day of pre-school was to take off on a fun weekend trip. He decided Wednesday night and we left on Thursday after "graduation" and work. He booked a hotel and planned the itinerary, so I just did what I had time to do and then got in the car. It worked out pretty well to take a trip with me just going with the flow! Maybe all our trips should work like that.
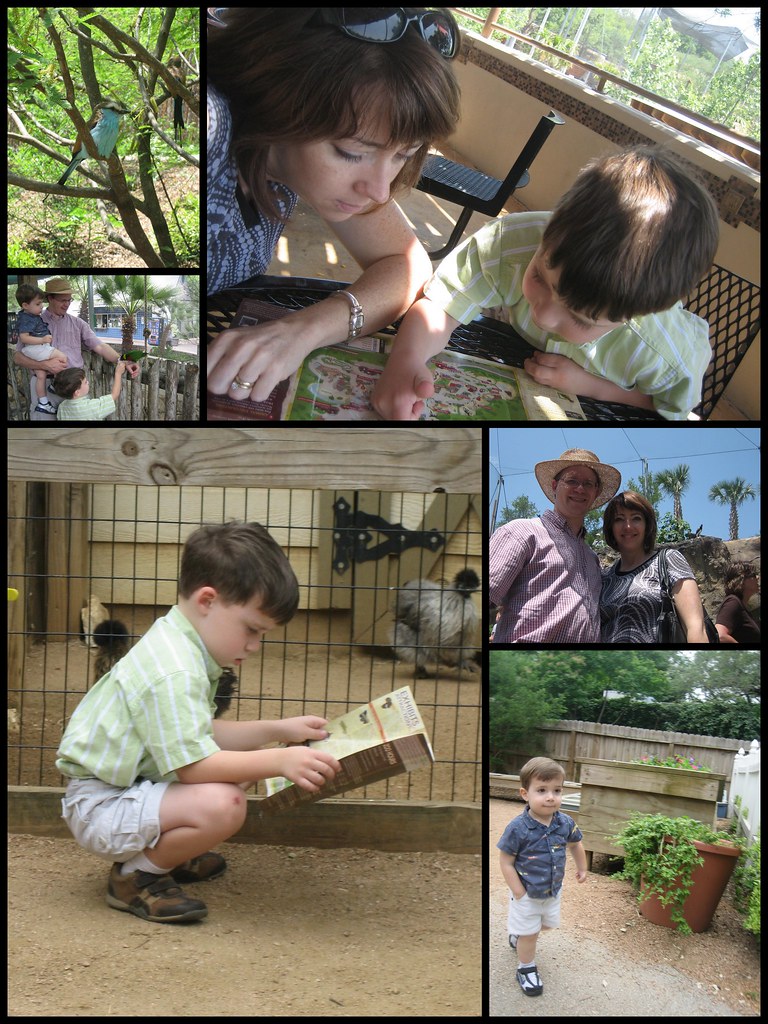
The first stop on our whirlwind visit to Houston was the Space Center. Zack has always been keen on the moon and astronauts so we've been wanting to take him to the Space Center for a while. James remembers this as a great place he visited as a kid. At that time, the visitor area was in the same campus as NASA's working area. Now it has been split into a separate campus but there is a tram that takes you (after additional security scans) through some key locations in the NASA area. The boys considered it at "train" rather than a "tram" and we went with it because that was exciting for them. As we went through the artifacts, I was most impressed with the size of the Saturn V rocket that sent Apollo 11 to the moon (that's it in the bottom two pictures). It was gigantic! There were also lunar rovers, moon rocks (which we all got to touch) and many other cool things. The one thing I didn't like was the placement of the very cool play structure. It was the first thing you saw when you came in the door, so of course the boys wanted to do that and didn't really want to see the rest of the exhibits. We did drag them away to look at actually cool stuff, but then they wanted to go back. We did go back, and yes, it was a fun playscape. How about putting that at the back, museum planners?
Thursday, May 27, 2010
Book Review: Honey for a Child's Heart by Gladys Hunt
Today I'm over at For the Love of Books with a book review of Honey for a Child's Heart: The Imaginative Use of Books in Family Life.
I've already pulled some of the recommended titles from the book lists to request at the library, but I'm even more excited about some of the habits she suggests for reading together. Check it out!
Wednesday, May 26, 2010
Teacher Gifts
I really wanted to make something as an end of year gift for Zack's teachers but wasn't feeling very kitchen-y. I have a hard time with gifts like this. There is a lot of pressure to give gift cards. I feel like this gift-card-society is something I can't quite get my head around. Like if you are going to give a gift, of course you want the person to be able to have something they actually want. But then on the other hand, you want to give a part of yourself, a connection, as well. I've decided on handmade gifts, choosing items that I think I can do a good job with, but I can't help being self-conscious about it too. I don't want to give something that isn't of value... but any item, even a gift card can turn out that way, right? I've had too many gift cards expire or be lost (shh, don't tell anyone, I feel bad about that too!).
Anyway, back to what I actually did.
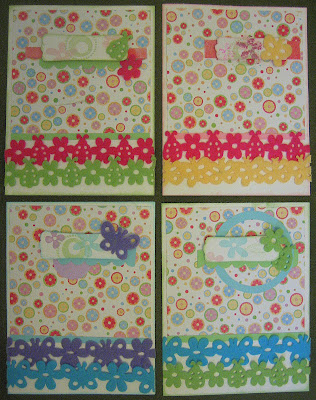
A few weeks ago I went to a stamping class in which we made a handmade box to use for gifting handmade cards. That inspired me to create two gift sets with four handmade notecards, four matching gift tags in a matching box. They all used some felt cut-out ribbon I found in a rainbow of colors. I originally wanted to put the whole rainbow on each card, but it turned out to be a little much and I had to settle for some pretty color pairs.
I liked how the cards turned out. I used my new Crop-A-Dile Big Bite to quickly and quietly set the eyelets for the tags, which I also liked. Both have a lot of texture with that felt ribbon. I didn't love the box, though. Cheryl's design was perfect - easy to make and sized exactly right, but I just thought the color turned out too pale for the cards and tags. Also, when we made it at class we used masks so the stamps could overlap for a much more elegant effect, but it was after midnight and making masks wasn't in the cards (so to speak, heh).
I was surprised at how long this took me. I usually make cards for the fun of using random paper scraps or to get the creative juices flowing. I guess I thought that creating one design then duplicating it eight times (sixteen if you count the tags, and I do) would go pretty quickly. Not so. This was time-consuming! I keep thinking I should make some for myself but I'm all out of that flower-circle paper... and I got tired. Not tired of making them, just tired!
Tuesday, May 25, 2010
Last Day of Preschool
Thursday was Zack's last day of pre-school. It feels like a big change for our family. Three days of school a week feels about right for our family. Maybe after a summer of no school I'll be more ready for that change, huh?
We attended his graduation then took off for a weekend of museums and other fun in Houston. Now we're back and the reality of pre-school being done is sinking in. Elementary dropoff isn't going to look like this, is it?
Monday, May 17, 2010
More Veggies
As I mentioned, I am constantly trying to make sure we have good, tasty vegetables for our family dinners. Before James, I would often make a salad as the vegetable. As in: Casserole + Salad = Dinner. That's ok, especially if the main dish has vegetables in it, right? But it wasn't really quite enough items for James. I really like a big salad as part of most meals, so I still have a salad (I eat 3/4 of it and the rest of the family splits the other 1/4). But I try to have another vegetable too.
These carrots are a go-to veggie around here. The original recipe from Ina Garten is roasted in the oven, which is super for the winter. But here in the southern part of the country, it's already too hot to have the oven on right at the hottest part of the day. So, I cook them in the skillet. To get them really tender, I have to put the lid on and let them steam for a while (or pre-cook them in the microwave), then I make sure to take the lid off and turn the flame up so i get those sweet singed edges.
I think the cutting method - turning the carrot a quarter turn and slicing on the diagonal - is an important part of the preparation because it creates nice sharp corners that caramelize so well. This can be plain, tossed with dill or parsley, or cooked with ginger or garlic. It's a great, versatile, quick and tasty. And oh yeah, easy. Easy is good.
Thursday, May 13, 2010
Make your friends feel like Rock Stars
When I pulled out some cards to send to family recently, I realized everything I have made lately has a brown as part of the color scheme. I love browns and I was using some nature-inspired stamps, so it made sense to have lots of browns. But, I also decided I wanted to branch out into some other color schemes. A particular friend inspired this design and I really had fun with it. She said she got a kick out of the colors - something about feeling like a rock star, hee hee.
Check out the how-to on the twisty paper flower if you'd like to make a super-easy embellishment.
Wednesday, May 12, 2010
Photo Session
I'm so excited to have had some family pictures taken! We haven't done this since I was expecting Sammy! Check out our awesome photographer, Brandi, and some pictures from our session (and how about these from way back?).
Tuesday, May 11, 2010
Cutie
What a smile! This boy has been sick - a couple of days of fever last week and now a lingering cough that he persistently describes to us as "owie". It may be slowing him down, but it sure isn't keeping him down!
Monday, May 10, 2010
Scrapbooking weekend and a layout
I had a great time this Saturday - some friends and I had been wanting to go to another scrapbooking retreat but it was just too hard to get away for two nights. So, we set up an all-day Saturday scrapbooking day. We arrived at 8am and worked until midnight - fun fun! I got several layouts for Sammy's baby book finished.
This layout was my favorite.
I really love this green background paper, echoing the color in the photos, and the printed flower on the left. I stepped out of my comfort zone by using a craft knife (not my usual skill set!) to cut out the petals on one flower and the stem of another so that I could tuck my pictures underneath them. I love that little felt tree (an extra from this set of cards). I'm also very fond of those bath pictures so there were a lot of things about the layout I really enjoyed.
After I got the entire thing done and the title "SEPTEMBER" completed in embossed ink (being extra careful to spell it correctly since I was working letter by letter), I suddenly realized, "What am I thinking! THIS WAS OCTOBER!"
I am going month-by-month for Sammy's baby book, doing a layout for each month and extras for other specific stories I want to tell. Even though I don't plan to continue this chronological ordering in my other scrapbooks, I wanted to show how much the baby changed each month when he was so little. The chronology is important to this story. I had skipped September because I had to reprint the pictures for it and I hadn't had time to pick them up before my craft-errific workday. I guess that threw me off because when I was ready to do the next spread, I titled it incorrectly.
At least we all got a good laugh about that!
Thanks to my crafting partners and my sister I have a plan for "fixing" it. That's how it goes some days, right?
Saturday, May 08, 2010
Happy Mother's Day Weekend to You
I was rather honored to receive this beautiful card in the the mail from my sister (I didn't send her one... she gets a special good sister award)! I thought I would share it and wish you all a Happy Mothers Day.
Friday, May 07, 2010
Roasted Cauliflower
I'm always looking for more vegetable preparations that we all love. I kept remembered a party I'd gone to a few years ago at which I couldn't believe how tasty their roasted cauliflower was. As someone who has a terrible intolerance of broccoli, I'm wary of it's close relatives, but this was not skunky at all (which is how broccoli smells to me). I was truly incredulous that I was really eating cauliflower. I recently thought back to it and wanted to try it for my family. I don't think this matches the sweetness I remember from that party, but it was certainly good enough to become one of our standards.
There are a lot of recipes for this but they are pretty similar - toss the florets from a head of cauliflower with minced garlic, lemon juice, salt, pepper and olive oil. Roast in a single layer at 400 for 25-30 minutes. Sprinkle generously with fresh Parmesan cheese and serve.
James said he was turned off by the dark color. Zack kept asking if each piece was burned. I was a little surprised at their reaction because I serve most vegetables with little caramelized edges, but it was new for cauliflower. They all enjoyed the taste, however, so hopefully it'll be more appetizing in appearance to them next time, when they are sure it will taste good!
Thursday, May 06, 2010
Eating Adventures
This "fun food" had a 50% chance of turning out fun.
I told Zack I had something cool to try for dinner. He asked, with his nose wrinkled up, "It isn't kale chips, is it?" Ok, I guess I haven't won the child over to kale chips (but I promise, they are delicious). I knew there was a pretty good liklihood that he would be weirded out by the artichoke, too. But, you loose some... and you win some! Zack loved the artichoke!
It could have been the dipping butter that did it (we each had our own little ramekin), but he thought it was great fun. He started with just a leaf but then went for a whole artichoke, exclaiming in surprise, "I looove this food! Can I eat the whole thing?" He even used a table knife to scrape off the choke himself and eat the heart.
They are pretty easy to prepare - you just cut off the stem and the top third, snip any sharp ends of the leaves and steam until the leaves will pull off easily and the flesh is tender. I just steam them in the microwave by standing them in a shallow dish with some water and covering. It takes several minutes of cooking. There is just a bit of edible flesh at the base of each leaf (increasing as you move from the outer leaves inward) so you dip and then scrape it off with your teeth. It sounds like it would scrape against your teeth and set them on edge, but it doesn't (well, we don't think so anyway). When you run out of leaves and just see a thistle-like center, cut off the spiny-looking part and eat the rest. Melted butter with a squeeze of lemon juice makes a tasty dip.
I thought it would be a fun and festive appetizer, but we ate our main mean and then relaxed at the table and visited and ate our artichokes. Even Sammy had a bit and enjoyed it. I have assured Zack that I'll try to have these again before they are out of season.
Wednesday, May 05, 2010
Say What?
Zack took this picture of a guinea fowl at the San Antonio Zoo this weekend. Isn't it too funny?
We had a great time on an impromptu road trip to the zoo. It seemed like it might be the last not-scorching-hot day for a long time so we wanted to make the most of it. Sammy is getting old enough to really enjoy the zoo and Zack is getting so independent!
Tuesday, May 04, 2010
Itty-Bitty Pretty
I am excited to share this little project - and I mean little! This miniature quilt is only 11 x 12.5 inches but it was really fun to do.
Way back in 1998, when James and I were engaged (wow, we are getting old), I went with his family to their family reunion in Indiana. It was a neat trip with a lot of good memories. One of the traditions the reunion group has is to have a "quilting challenge" every reunion. There were several ladies participating, though not all of them. They would go to a nearby quilt shop, pick a fabric and divide it up with the idea that each person would bring a finished project back the next time. There was a little upset over a not-quite-a-member of the family taking some of the limited amount of fabric and I didn't think I would end up getting to play along, but a very kind cousin surprised me by mailing me some of hers. The funny thing was that when I said, "Oh, I only need a scrap," I really meant it. There is probably not two square inches of any one fabric in the whole quilt!
This was created from a pattern in a magazine and believe it or not, the piecing was quite easy. You make six copies of a foundation template and machine sew directly onto the paper - no marking or measuring whatsoever. Once you get a little rhythm going it is quite fun. The challenge fabric was a big floral print with blue, yellow, white and black ("challenging" indeed). It was interesting in that it had very dark areas and very light areas, so I was able to put in in every side of every row of the quilt one time. That means there is a piece of it in each dark row and each light row. You can see an example of a dark and a light piece of the challenge fabric in the close up photo; the dark is it is the blue piece in the lower left corner, second from the bottom (well, technically third but you can barely see that teensy piece in the very corner) and the light is the white piece with a little blush of blue, fifth up (technically sixth if you can see that little corner) from the bottom in the light row next to it.
There are also many of James' grandmother's flour-sack fabrics that she had saved over the years. She died when James was a baby but some things like her old fabrics remain. It seemed fitting to include them. Even though many were rather fragile, this quilt seemed like a good way to incorporate them, since it won't be taking a lot of wear.
I've been trying to piece together when I actually made it. I think I started right away. But I know I got stalled once it was time to do the quilting. I really wanted to follow through on the project, but I had only done quilting design work for my mom and piecing for myself. I'd never actually done the quilting. I tried it and hated it. It was frustrating and so slow. I didn't like the results I was getting and by that time I had a toddler so the idea of "just take it with you and work on it when you are waiting for things" wasn't happening at all. Meanwhile, I had picked up two more reunion's worth of quilting challenges!
The reunion ladies showed me some lovely pieces that they had machine quilted on regular sewing machines. I hadn't really realized that was possible! I eventually took a machine quilting class at a local quilt shop. It was neat but it takes practice and I never took the time to make a practice quilt (who wants to work on something that's just practice??).
This week with my mom visiting we decided to just go for it and try machine quilting (I started on another piece). It was so much fun. I'm still working on finishing the binding on that one, but I immediately did the quilting on this teensy one and we got it finished right away. It was really nice to have a cheering section and someone to rip out my mistakes so I could just correct them right away and not get discouraged and stalled.
I feel a little astounded that I actually finished a project. I was beginning to think I should just chalk it up to a character flaw. This opens the possibilities for all the crafty projects I could actually get done... someday. Or maybe when my mom visits again!
p.s. Julie says I need a photo with something recognizable in it to better show the scale, so here it is:
Subscribe to:
Posts (Atom)